OS Development on Linux
Most users can simply use a pre-built binary from the releases page and install it manually or using the web installer.
But if you want to modify things under the hood, you're in the right place!
Get the prerequisites
Make sure you have everything installed to compile code:
sudo apt update
sudo apt-get install -y build-essential libffi-dev pkg-config cmake ninja-build gnome-desktop-testing libasound2-dev libpulse-dev libaudio-dev libjack-dev libsndio-dev libx11-dev libxext-dev libxrandr-dev libxcursor-dev libxfixes-dev libxi-dev libxss-dev libxkbcommon-dev libdrm-dev libgbm-dev libgl1-mesa-dev libgles2-mesa-dev libegl1-mesa-dev libdbus-1-dev libibus-1.0-dev libudev-dev fcitx-libs-dev libpipewire-0.3-dev libwayland-dev libdecor-0-dev libv4l-dev librlottie-dev
Download the code
Clone the repositories:
git clone --recurse-submodules --depth 1 --shallow-submodules https://github.com/MicroPythonOS/MicroPythonOS.git
cd MicroPythonOS/
That will take a while, because it recursively clones MicroPython, LVGL, ESP-IDF and all their dependencies.
Optional: updating the code
If you already have an old clone and you want to update it, the easiest is to just delete it and re-clone.
But if you need to save on bandwidth and time, you can instead do the following, which will throw away all local modifications:
cd MicroPythonOS/
git submodule foreach --recursive 'git clean -f; git checkout .'
git pull --depth 1
git submodule update --init --depth 1
Compile the code
Use the build_mpos.sh script for convenience.
Usage:
./scripts/build_mpos.sh <target system>
Target systems: esp32, esp32s3, unix (= Linux), macOS and web (= WebAssembly)
Examples:
./scripts/build_mpos.sh esp32
./scripts/build_mpos.sh esp32s3
./scripts/build_mpos.sh unix
./scripts/build_mpos.sh macOS
The resulting build file will be in lvgl_micropython/build/, for example:
lvgl_micropython/build/lvgl_micropy_unixlvgl_micropython/build/lvgl_micropy_macOSlvgl_micropython/build/lvgl_micropy_ESP32_GENERIC_S3-SPIRAM_OCT-16.bin
Running on desktop
MicroPythonOS runs on Linux, macOS and Raspberry Pi desktops. The desktop build is a single executable that contains the whole OS, so you usually do not need to compile anything.
Pick the level that matches what you want to do.
Level 1: Just want to run it?
Grab a pre-built binary and launch it.
- Download the binary for your platform from the releases page:
- Linux, Raspberry Pi, WSL2 on Windows:
lvgl_micropy_unix - macOS (Apple Silicon or Intel):
lvgl_micropy_macOS - Make it executable:
chmod +x lvgl_micropy_unix
- Run it. From a terminal:
./lvgl_micropy_unix
Or double-click it in your file manager. You may want to rename it to MicroPythonOS first.
Level 2: Want to develop an app but use a prebuilt OS?
You can use a downloaded OS binary with a full source checkout so you can edit apps and see changes immediately.
- Clone the repository:
git clone --recurse-submodules https://github.com/MicroPythonOS/MicroPythonOS.git
cd MicroPythonOS
- Download the binary for your platform from the releases page. Rename it and put it where the runner script expects it:
- Linux / Raspberry Pi / WSL2 →
lvgl_micropython/build/lvgl_micropy_unix - macOS →
lvgl_micropython/build/lvgl_micropy_macOS
mkdir -p lvgl_micropython/build
cp /path/to/downloaded/binary lvgl_micropython/build/lvgl_micropy_unix
chmod +x lvgl_micropython/build/lvgl_micropy_unix
- Run it with the helper script:
./scripts/run_desktop.sh
scripts/run_desktop.sh launches the OS using the Python files in internal_filesystem/ directly, so any edit you make there appears the next time you restart the app. No rebuild is needed.
Try it:
- Edit
internal_filesystem/builtin/apps/com.micropythonos.about/assets/about.py - Run
./scripts/run_desktop.sh - Open the About app
- See your change immediately
Once your app works on desktop, deploy it to a physical device with Installing on ESP32.
Level 3: Want to build the OS yourself?
If you need to change the OS itself, add C extensions, modify MicroPython/LVGL bindings, or run the very latest code, build from source. The binary will already land in lvgl_micropython/build/lvgl_micropy_XXX where XXX is unix or macOS.
./scripts/build_mpos.sh unix     # Linux, Raspberry Pi, WSL2
./scripts/build_mpos.sh macOS    # macOS
See Compiling for the full instructions, including cloning and dependencies.
Known issues and fixes
Linux: "No such file or directory" when running the binary
Make sure it is executable:
chmod +x lvgl_micropy_unix
macOS: missing libffi.8.dylib
Install libffi:
brew install libffi
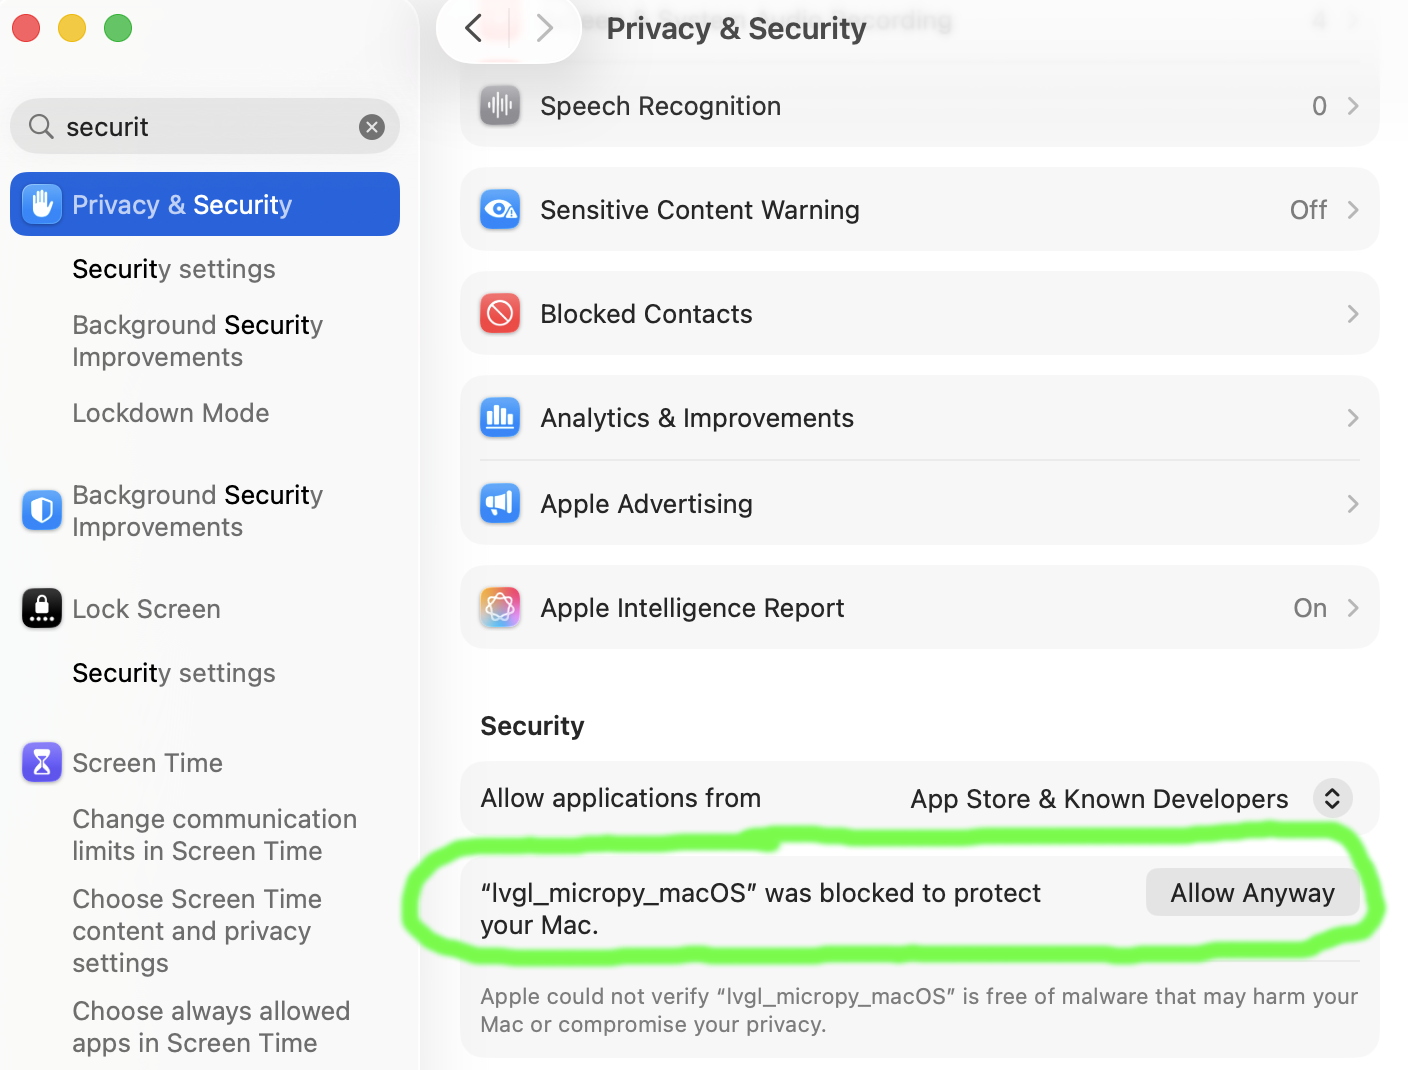
macOS: "cannot be opened because the developer cannot be verified"
The prebuilt binary is not signed. Open System Settings → Privacy & Security and click Allow Anyway next to the blocked item, then run it again.
Windows
Native Windows builds are not supported. Users report that the Linux desktop binary works under WSL2 on Windows 11. Alternatively, you can try the web port, which runs a desktop build in the browser.
Keyboard shortcuts
The desktop emulator supports these keyboard shortcuts:
| Shortcut | Action |
|---|---|
| Ctrl+Shift+S (Cmd+Shift+S on macOS) | Save a screenshot as BMP in the working directory |
Screenshots are saved with a timestamped filename like screenshot-YYYYMMDD-HHMMSS.bmp. The path is printed to the console so you know exactly where the file was written.
Deploying to hardware
Once your app works on desktop, install it on a supported ESP32 device.
The easiest way to install on the ESP32 is using the webinstaller, of course.
But if you need to install a version that's not available there, or you built your own, then you can manually install it on an ESP32 device.
-
Get the firmware
-
Put the ESP32 in Bootloader Mode
If you're already in MicroPythonOS: go to Settings - Restart to Bootloader - Bootloader - Save.
Otherwise, physically keep the "BOOT" (sometimes labeled "START") button pressed while powering up the board. This is explained in more detail at the webinstaller
-
Flash the firmware
~/.espressif/python_env/idf5.2_py3.9_env/bin/python -m esptool --chip esp32s3 write_flash 0 firmware_file.binAdd the
--erase-alloption if you want to erase the entire flash memory, so that no old files or apps will remain.There's also a convenient
./scripts/flash_over_usb.shscript that will attempt to flash the latest firmware that you compiled yourself. -
Access the MicroPython REPL shell
After reset, the REPL shell should be available on the serial line.
Any serial client will do, but it's convenient to use the
mpremote.pytool that's shipped with lvgl_micropython:./lvgl_micropython/lib/micropython/tools/mpremote/mpremote.py -
Populate the filesystem (only for development)
In development, you probably want to override the "frozen" libraries and apps that are compiled in, and replace them with source files, which you can edit.
This makes MicroPythonOS startup a lot slower, as the Python scripts have to be compiled at runtime instead of at build time. But once MicroPythonOS and the code you're testing has loaded, the speed will be normal again.
There's a convenient script that will do this for you.
Usage:
./scripts/install.sh./scripts/install.sh com.micropythonos.about # to install one single appMake sure there is enough free space on the device (~3-4 MB) to fit the files. If needed, free up space from the REPL:
import shutil ; shutil.rmtree("/roms")
import shutil ; shutil.rmtree("/cache")
On MacOS, the install.sh script needs:
brew install --cask serialIf you need to frequently update a small number of files, you can also update them manually, for example:
./lvgl_micropython/lib/micropython/tools/mpremote/mpremote.py cp internal_filesystem/lib/mpos/device_info.py :/lib/mpos
Notes
- Ensure your ESP32 is compatible (see Supported Hardware). If it's not, then you might need the Porting Guide.